

Here is my write up of my shackle and TB lift and how to install new front and rear shocks.
Chevy Colorado Z71 Shackle and Torsion Bar Lift
Items Needed:
1. Hydraulic Jack that reaches 21 inches (The tires need to be able to leave the ground)
2. 21 Inch jack stands
3. Wheel blocks
4. 3/4” wrench
5. 3/4” socket
6. 9/16” wrench
7. 5/8” wrench
8. 1/2” socket
9. 10” extension for socket wrench
10. 1-1/16” socket (for torsion bar adjustment) rotate clockwise will lift the truck
11. 3/16 Allen wrench
12. Vise grip or pliers
13 WD40 (spray all bolt the night before, makes it easy to remove them)
14 Copper Anti-Seize (use to re-grease shackles and shocks)
15 Hammer
Purchase:
1. Shackles http://www.synergyoffroad.com or PM Bubaloo http://www.coloradofans.com/forums/memb ... file&u=157
2. Shocks, Rancho RS5300-Front / RS5325-Rear I got mine from a local auto parts store.
Step 1.
Remove the Spare tire with the kit available under the passenger seat.
-Assemble the kit, crank the rear tire down and remove it.
![Image]()
Step 2.
Place the Jack in front of the rear leaf spring and jack it up as high as you can.
![Image]()
Place a Jack stand under the frame, lower the jack until the frame is secure on the jack stand. Do the same to the other side of the truck. The rear wheels should be completely off the ground.
Step 3.
Loosen the rear shackle bolts with a 3/4 in wrench and socket.
![Image]()
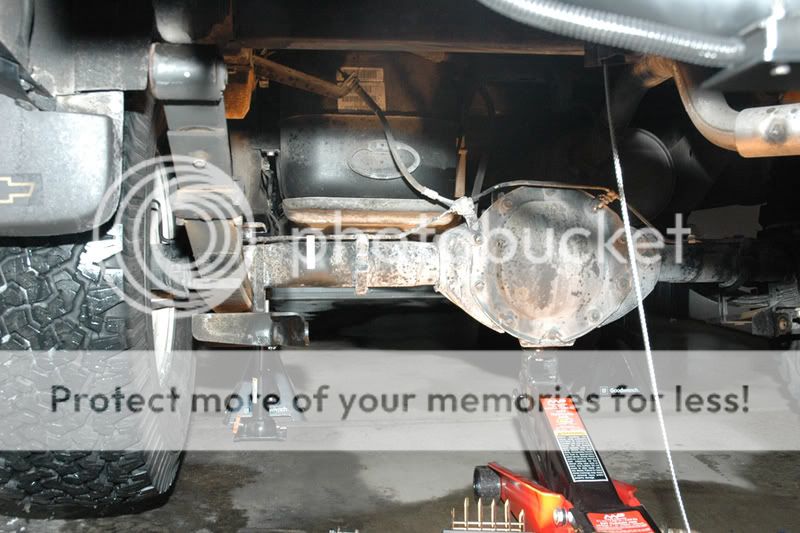
Step 4.
Use the Jack to raise the rear differential to take the tension off the springs. You’ll know when you’ve raised it enough because the shackle will become loose.
![Image]()
You should now be able to remove 3 of the 4 bolts from the shackles.
Use a hammer to knock the bolts out.
I used my 10” socket extension to help remove the bolts from the holes.
*You will need to lower the rear differential enough to allow for the bottom right shackle bolt to clear the exhaust pipe, remove the final shackle bolt.
Step 5.
Remove the bottom bolts from the rear shocks using a 3/4” wrench and socket.
(Save these bolts and nuts, you will need them to install the new shocks)
![Image]()
If you do not unbolt or remove the rear shocks the axle will not drop far enough for the springs to line up with the bottom shackle bolt.
Step 6.
Remove the top bolts of the shocks (2 bolts per shock) using a 1/2” socket and the 10” socket extension. The shock will just fall off so watch your face. (Save the bolts to be reused when installing new shocks)
![Image]()
Step 7.
Now we are ready to install the new shackles. Grease the holes of the shackle with some anti-seize. Insert the top bolt and hand tighten the nut.
![Image]()
After both top bolts are in, adjust the jack up or down so the springs line up with the bottom holes of the shackle. Insert the bottom bolts and hand tighten.
Step 8.
Install the rear shocks using the bolts you used from the stock shocks with a 3/4” wrench and socket for the bottom bolt and 1/2” socket and 10” extension for the top bolts. I used Rancho 5190 shocks. Use anti-seize in the bottom shock bolt hole.
![Image]()
Step 9.
Reinstall the spare tire
Step 10.
Lower the jack all the way down (remember all your shackles bolts are still loose)
Step 11.
Tighten all the shackle bolts as much as you can.
Jack up each side of the truck in front of the rear leaf springs one at a time to
remove the jack stands.
YOU’RE DONE WITH THE REAR END!
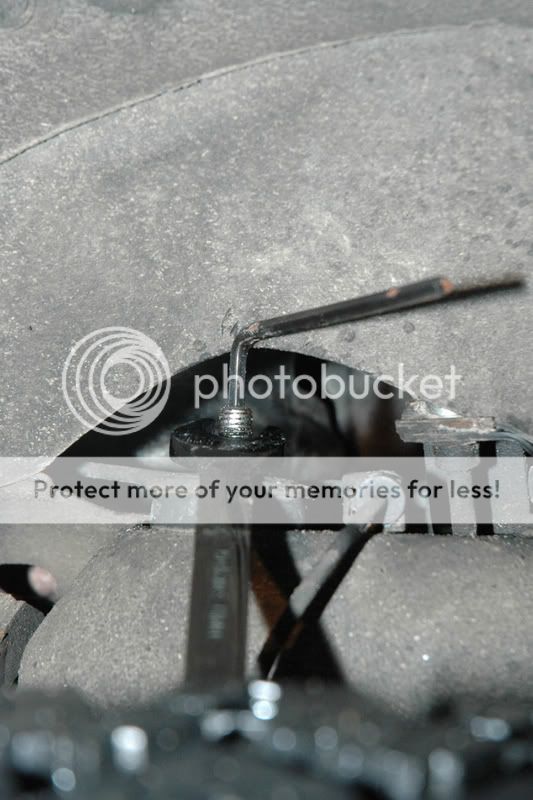
Step 12. TORSION BAR ADJUSTMENT
Raise the front of the truck until the front wheels are off the ground. Place jack stands under the frame and lower the jack.
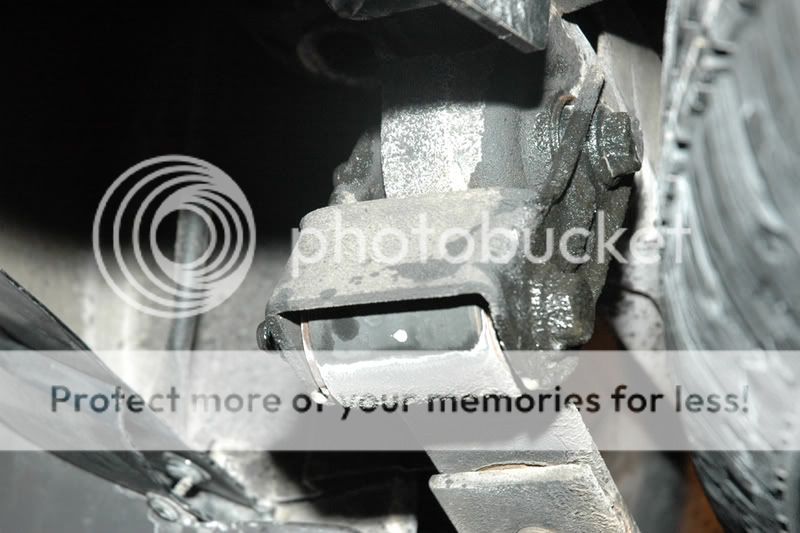
The Torsion Bar is located under the truck half way down the front doors
![Image]()
![Image]()
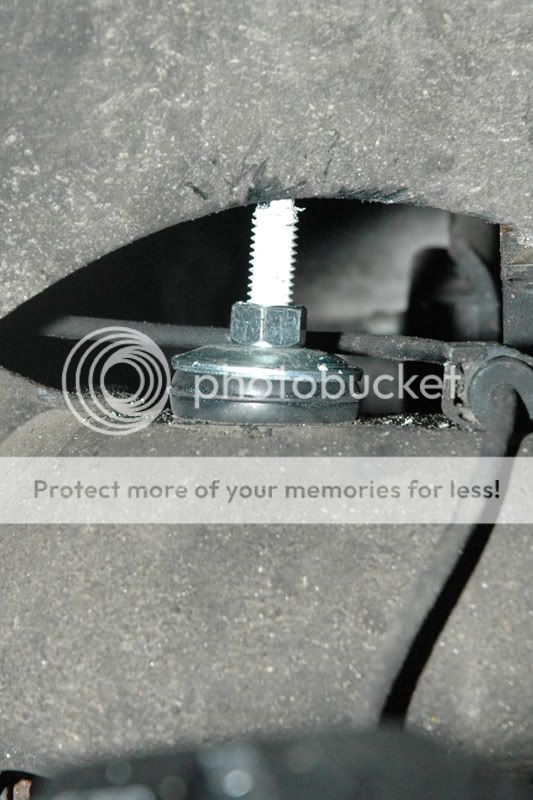
Use a marker to draw a straight line running from the center of the bolt to the frame so you know when you’ve made one complete rotation.
Use a 1-1/16” socket to turn the bolt clock wise (right) to raise the front end of the truck.
I started by doing 5 complete turns on both sides.
Lower the truck back down to see if the height is where you want it and measure to make sure each side is equal.
I was easily able to turn the bolts with the truck on the ground. I proceeded to turn the passenger side 1 more turn and the drivers side 1-1/4 more turn to get both sides equal and the height where I wanted.
Have a front end alignment done.
Step 13. INSTALLING FRONT SHOCK
You don’t need to lift the truck up to replace the front shocks but it make things much easier.
Step 14.
Remove the bottom bolt from the shock using a 3/4” socket and wrench.
Save this nut and bolt for when you install the new shock.
![Image]()
Use a hammer and screwdriver to knock the bolt out.
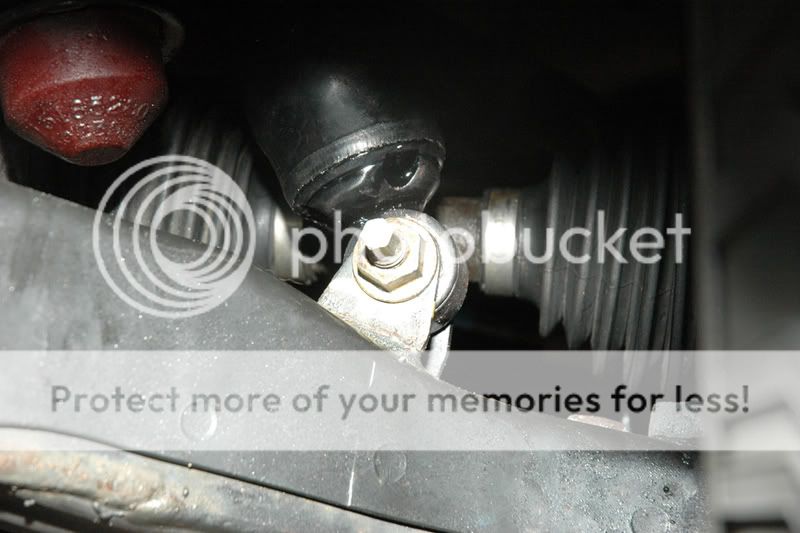
Step 15.
Remove the Top nut using a 5/8” wrench and 3/16” Allen wrench.
![Image]()
The Allen wrench fits into the top of the shock bolt. The shock will fall out onto the ground. You don’t need to keep any parts from the top of the shock you will NOT be reusing them.
Step 16. INSTALLING NEW SHOCKS
I used Rancho 5300 Shocks for the front.
A. Use anti-seize in the bottom bolt hole.
B. Place the shock into the location
C. Install the stock bolt and nut into the bottom bolt hole.
![Image]()
Step 17.
Install the top nut using a 1/2” wrench and the supplied hardware that came with your new shocks.
Install the rubber bushings and metal plates the same way they came off.
![Image]()
Use vise grips/pliers to hold the top of the bolt to keep it from spinning and tighten down the nut as much as you can.
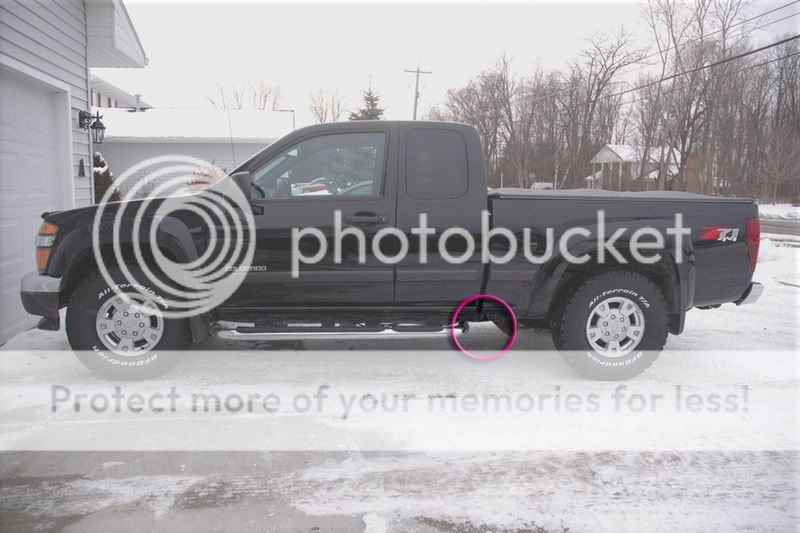
Wash the truck and take lots of pictures to show everyone!!!
![Image]()
THE END
Chevy Colorado Z71 Shackle and Torsion Bar Lift
Items Needed:
1. Hydraulic Jack that reaches 21 inches (The tires need to be able to leave the ground)
2. 21 Inch jack stands
3. Wheel blocks
4. 3/4” wrench
5. 3/4” socket
6. 9/16” wrench
7. 5/8” wrench
8. 1/2” socket
9. 10” extension for socket wrench
10. 1-1/16” socket (for torsion bar adjustment) rotate clockwise will lift the truck
11. 3/16 Allen wrench
12. Vise grip or pliers
13 WD40 (spray all bolt the night before, makes it easy to remove them)
14 Copper Anti-Seize (use to re-grease shackles and shocks)
15 Hammer
Purchase:
1. Shackles http://www.synergyoffroad.com or PM Bubaloo http://www.coloradofans.com/forums/memb ... file&u=157
2. Shocks, Rancho RS5300-Front / RS5325-Rear I got mine from a local auto parts store.
Step 1.
Remove the Spare tire with the kit available under the passenger seat.
-Assemble the kit, crank the rear tire down and remove it.

Step 2.
Place the Jack in front of the rear leaf spring and jack it up as high as you can.
Place a Jack stand under the frame, lower the jack until the frame is secure on the jack stand. Do the same to the other side of the truck. The rear wheels should be completely off the ground.
Step 3.
Loosen the rear shackle bolts with a 3/4 in wrench and socket.
Step 4.
Use the Jack to raise the rear differential to take the tension off the springs. You’ll know when you’ve raised it enough because the shackle will become loose.

You should now be able to remove 3 of the 4 bolts from the shackles.
Use a hammer to knock the bolts out.
I used my 10” socket extension to help remove the bolts from the holes.
*You will need to lower the rear differential enough to allow for the bottom right shackle bolt to clear the exhaust pipe, remove the final shackle bolt.
Step 5.
Remove the bottom bolts from the rear shocks using a 3/4” wrench and socket.
(Save these bolts and nuts, you will need them to install the new shocks)

If you do not unbolt or remove the rear shocks the axle will not drop far enough for the springs to line up with the bottom shackle bolt.
Step 6.
Remove the top bolts of the shocks (2 bolts per shock) using a 1/2” socket and the 10” socket extension. The shock will just fall off so watch your face. (Save the bolts to be reused when installing new shocks)
Step 7.
Now we are ready to install the new shackles. Grease the holes of the shackle with some anti-seize. Insert the top bolt and hand tighten the nut.

After both top bolts are in, adjust the jack up or down so the springs line up with the bottom holes of the shackle. Insert the bottom bolts and hand tighten.
Step 8.
Install the rear shocks using the bolts you used from the stock shocks with a 3/4” wrench and socket for the bottom bolt and 1/2” socket and 10” extension for the top bolts. I used Rancho 5190 shocks. Use anti-seize in the bottom shock bolt hole.
Step 9.
Reinstall the spare tire
Step 10.
Lower the jack all the way down (remember all your shackles bolts are still loose)
Step 11.
Tighten all the shackle bolts as much as you can.
Jack up each side of the truck in front of the rear leaf springs one at a time to
remove the jack stands.
YOU’RE DONE WITH THE REAR END!
Step 12. TORSION BAR ADJUSTMENT
Raise the front of the truck until the front wheels are off the ground. Place jack stands under the frame and lower the jack.
The Torsion Bar is located under the truck half way down the front doors

Use a marker to draw a straight line running from the center of the bolt to the frame so you know when you’ve made one complete rotation.
Use a 1-1/16” socket to turn the bolt clock wise (right) to raise the front end of the truck.
I started by doing 5 complete turns on both sides.
Lower the truck back down to see if the height is where you want it and measure to make sure each side is equal.
I was easily able to turn the bolts with the truck on the ground. I proceeded to turn the passenger side 1 more turn and the drivers side 1-1/4 more turn to get both sides equal and the height where I wanted.
Have a front end alignment done.
Step 13. INSTALLING FRONT SHOCK
You don’t need to lift the truck up to replace the front shocks but it make things much easier.
Step 14.
Remove the bottom bolt from the shock using a 3/4” socket and wrench.
Save this nut and bolt for when you install the new shock.
Use a hammer and screwdriver to knock the bolt out.
Step 15.
Remove the Top nut using a 5/8” wrench and 3/16” Allen wrench.
The Allen wrench fits into the top of the shock bolt. The shock will fall out onto the ground. You don’t need to keep any parts from the top of the shock you will NOT be reusing them.
Step 16. INSTALLING NEW SHOCKS
I used Rancho 5300 Shocks for the front.
A. Use anti-seize in the bottom bolt hole.
B. Place the shock into the location
C. Install the stock bolt and nut into the bottom bolt hole.
Step 17.
Install the top nut using a 1/2” wrench and the supplied hardware that came with your new shocks.
Install the rubber bushings and metal plates the same way they came off.
Use vise grips/pliers to hold the top of the bolt to keep it from spinning and tighten down the nut as much as you can.
Wash the truck and take lots of pictures to show everyone!!!

THE END


